Creating a Box App for use with bsync
Overview
You need to create a Box app with access to read/write your files/folders.
The app must have JWT server side auth enabled.
The JSON settings file with your keys will be required to run bsync
The whole process is also officially outlined by Box here
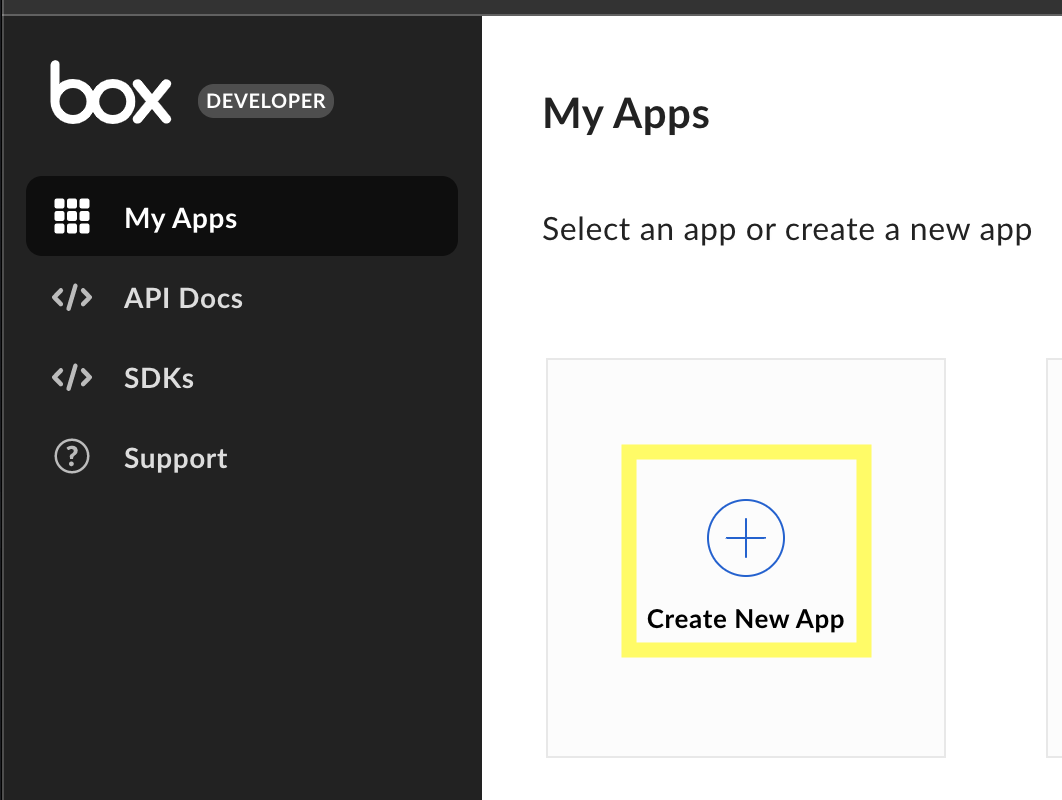
Create New App
On your own Box.com instance, navigate Dev Console > My Apps and click Create New App
https://app.box.com/developers/console
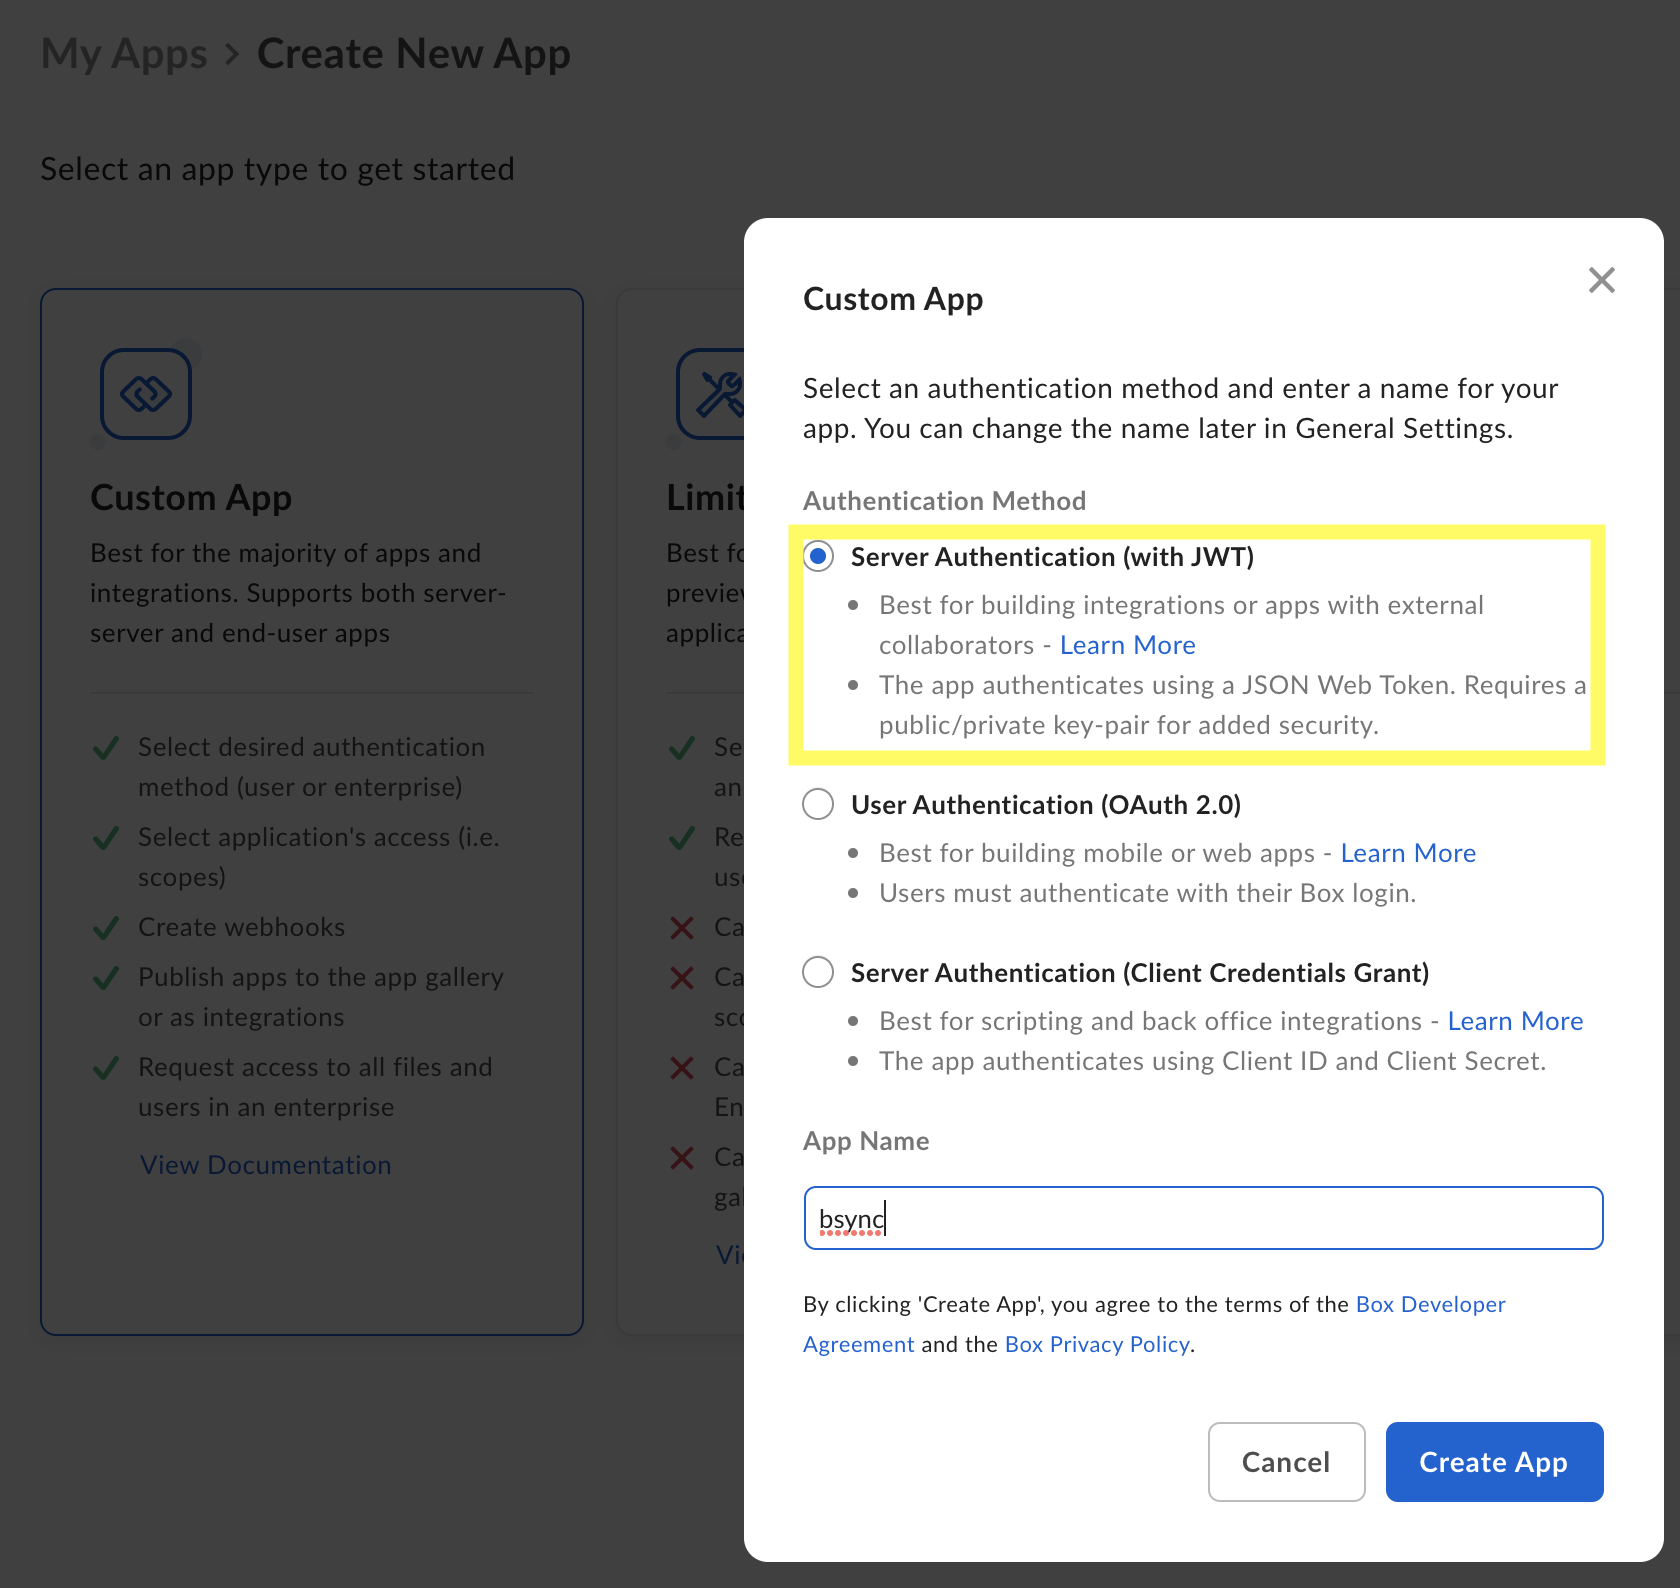
On the next page, use a Custom App with Server Side Authentication (with JWT).
Give your app a name and click Create App
Configure the App
In the Configuration section at the top, scroll down and add the Write all files and folders stored in Box. This is the only app permission that bsync requires.
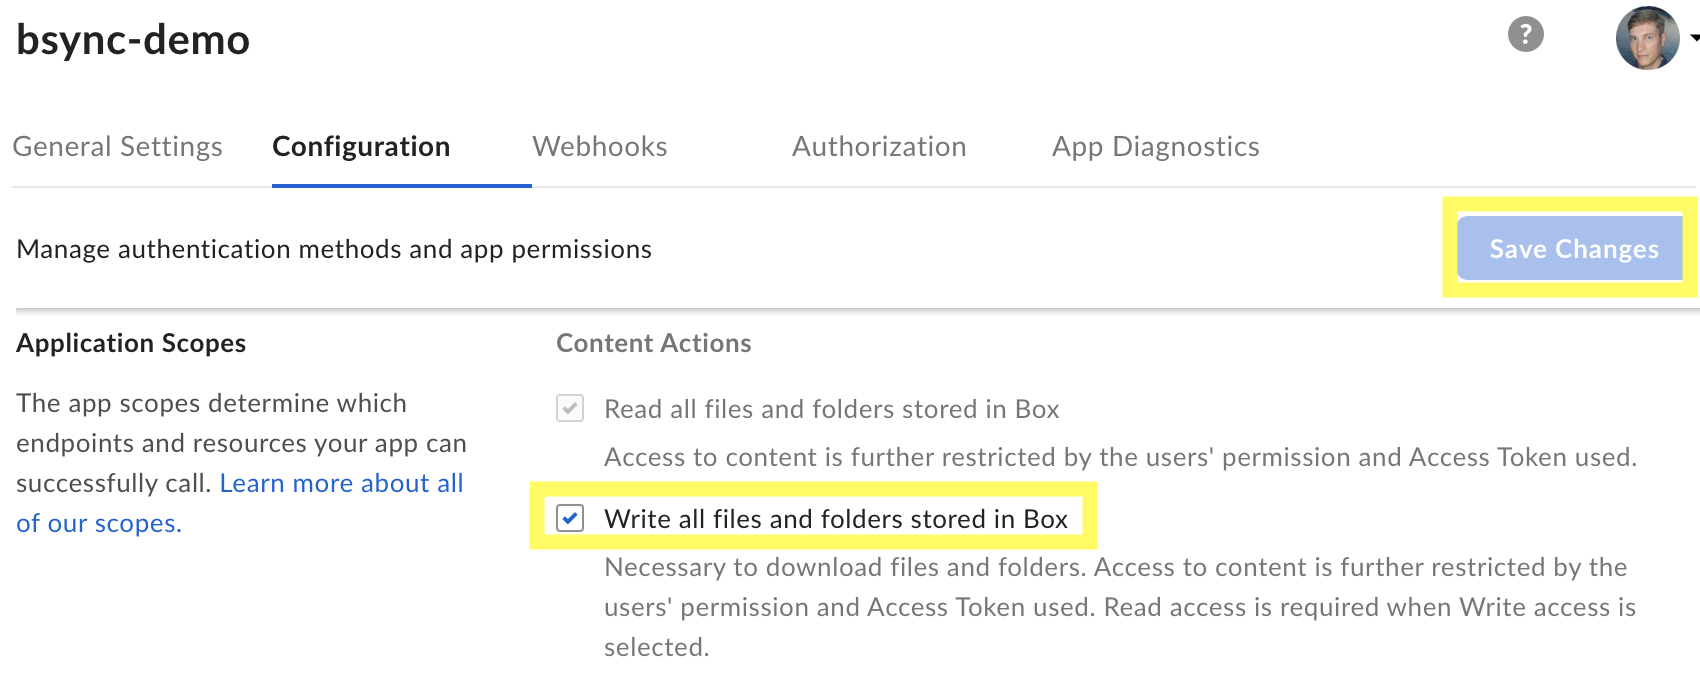
Once you have checked the box, you can click Save Changes at the top to update your app’s config.
App Authorization
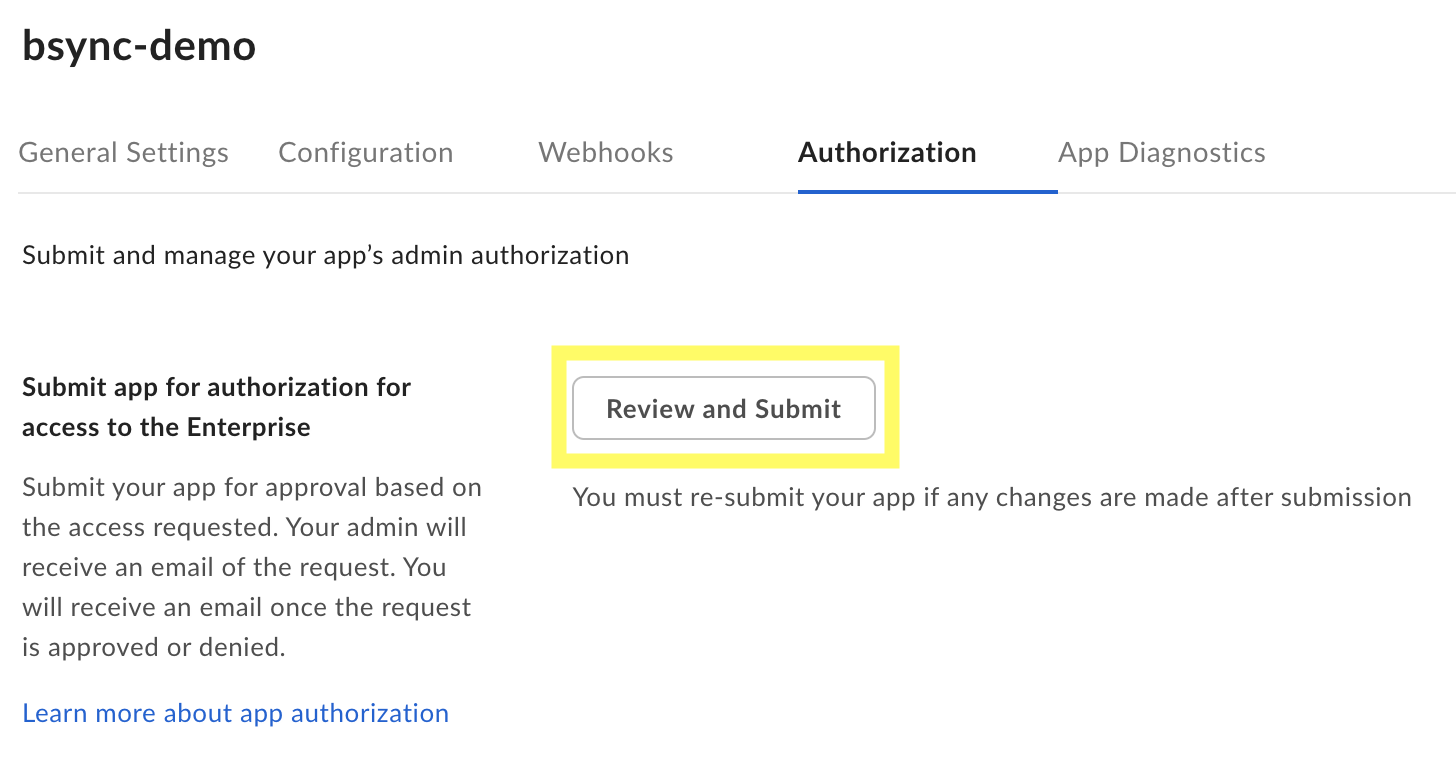
In the top menu, click on the Authorization tab. This section lets you submit your custom app to your Box administrators for approval. Your app must be approved before continuing with the setup. Click Review and Submit to publish your changes.
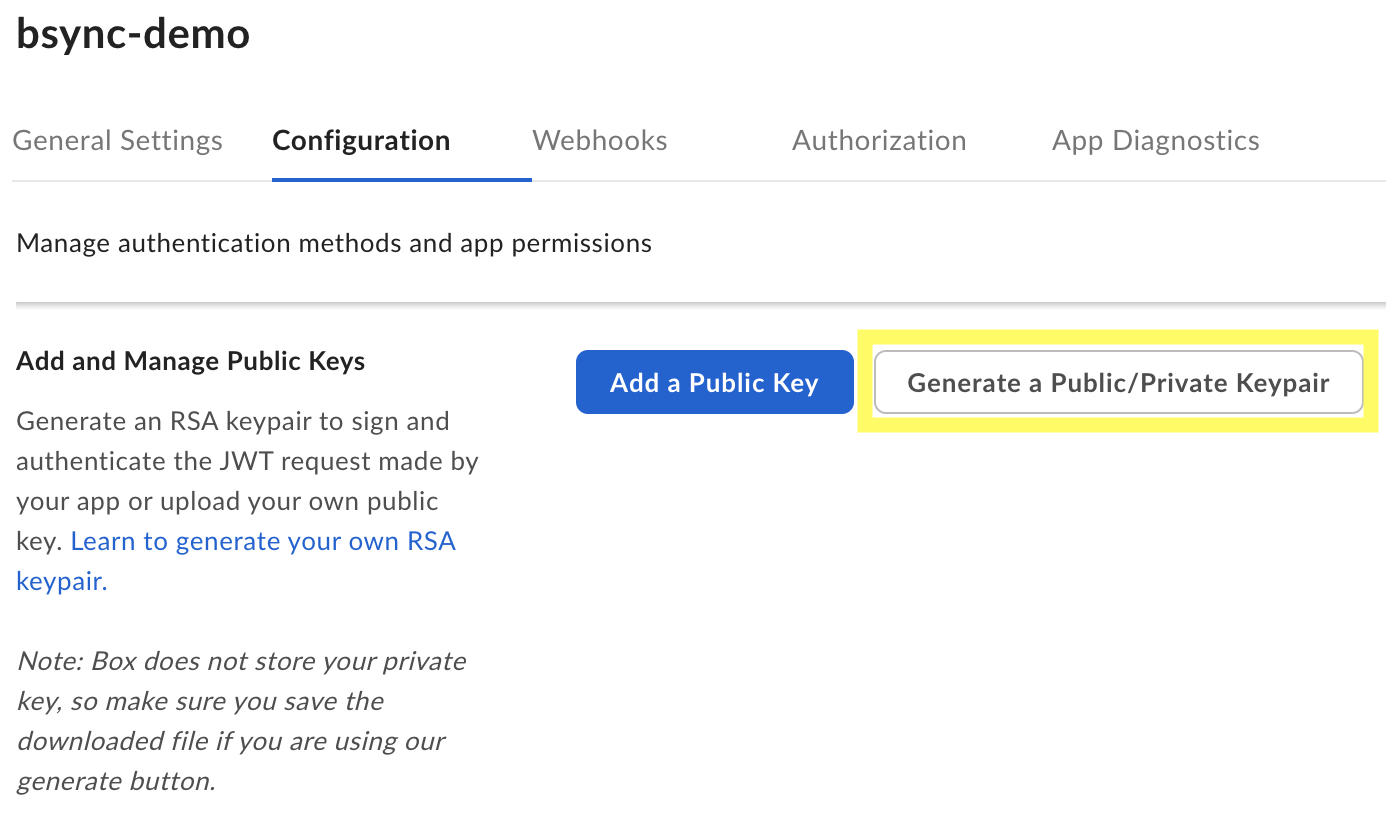
Generate your App’s Keys
Once your app has been approved by your administrators, go back to the Configuration tab in the top menu. Scroll down to the Add and Manage Public Keys section. Click the Generate a Public/Private Keypair. This will trigger a download of a JSON file from Box.com. KEEP THIS FILE PRIVATE! It contains your private key. You will use this file when running bsync
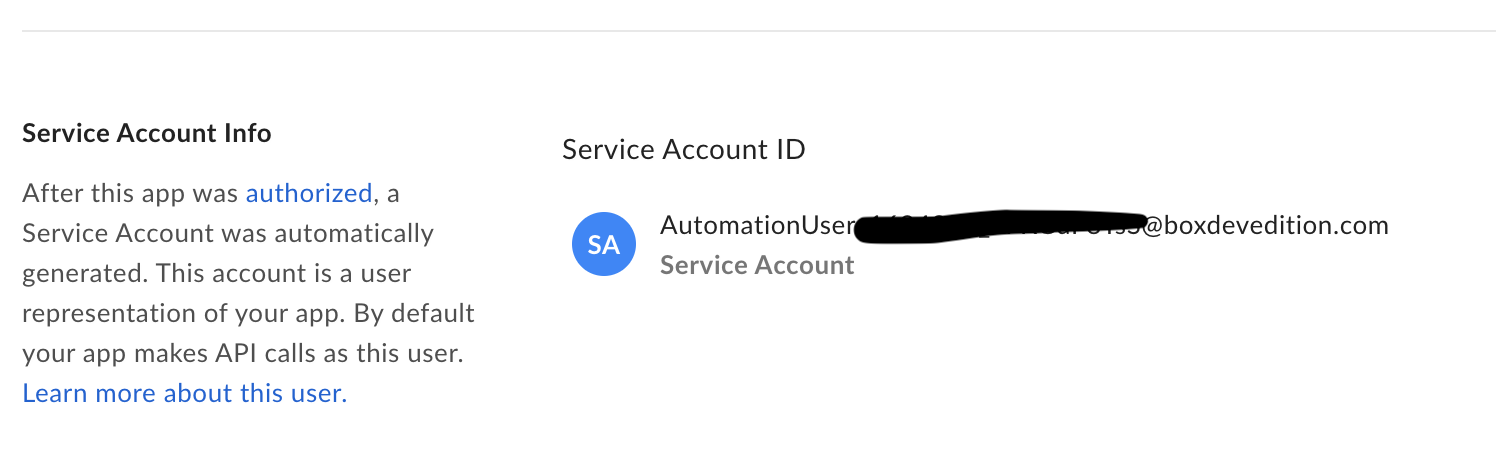
Add Service Account to Folders
In order for you to be able to use your app to access any of your folders, Box.com uses service accounts attached to the app. Under your app’s General Settings tab on the top left, scroll down to the Service Account Info and use the email address there to let your app collaborate with the folders you want to sync.
Now navigate to your target folders and add the service account by email to the folder as an Editor. Now your app has permissions to upload your files to the folder to which you have added your service account.

You have complete’d your app install, now you can bsync
Check out the Usage page to see how
